- Canada’s Growing Zones Are Changing 2024 - January 12, 2024
- Attracting Wildlife To The Garden - May 16, 2023
- How To Garden Near A Septic Tank - May 9, 2023
If you are new to this blog my name is Ashley and I am a soil scientist that loves teaching regular people how to garden. One great way to start a garden or build a garden with limited space is with containers. Container vegetable gardens have benefits and can increase your yields dramatically if done correctly. In many cases, it is a great idea to try a container garden even if you already have a regular garden setup.
If you are new to this blog my name is Ashley and I am a soil scientist. I am located in a Canadian Zone 3 and a USDA Zone 4. I write articles, make YouTube videos, Instagram & Facebook posts all designed for Canadians and Cold Climate gardeners using science-based methods. If you are looking for anything specific be sure to let me know in the comments down below.
In container gardens, things like peppers, tomatoes, lettuce, spinach, herbs & spices tend to do best. The reason for the plants having such great success in a container has to do with the root systems of the plants. A plant pot is a closed system meaning the inputs and outputs are less than that of an open garden system. Finding the perfect input-output balance is key to succeeding in a container garden setting.
How To Choose A Pot Size For Your Vegetable Container Garden?
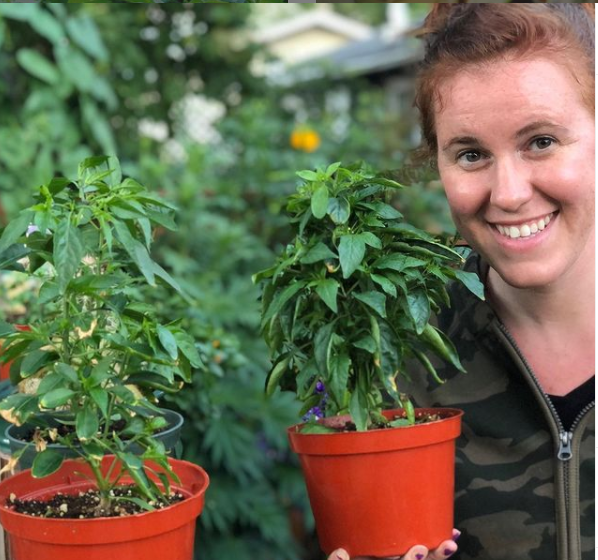
The quick answer to this is that there is no perfect size for everyone. For example, I have grown pepper plants in small one-gallon containers and tumbler tomatoes in hanging baskets. But there are a few factors to consider and those are mostly based on your lifestyle.
How often are you wanting to water?
When it comes to selecting a vegetable container garden size. The answer is once a week a bigger plastic container is an absolute must. The bigger the better when it comes to plants. Suc as corn, tomatoes, and melons due to these plants need a lot of water to be happy. If you are comfortable watering daily, then a five-gallon pail. Or a planter will work for a single tomato plant or pepper plant.
What Is Your Storage Like?
Containers made from plastic or ceramic are heavy and rigid. The second issue is that they tend to break in colder climates. After a summer in the sunshine and a winter at 40 below they tend to chip, crumble and crack. They are perfect for any container gardener that has space, and these containers are beautiful.
What Plastic Containers Are Safe For Gardening?
If you are choosing to use plastic containers the next question is which containers are safe for growing food. Believe it or not, plants are great at taking toxic substances from the soil and placing them into the plant’s upper biomass. Some plants called, hyperaccumulators are better than others and that is a statement that requires a whole separate blog post.
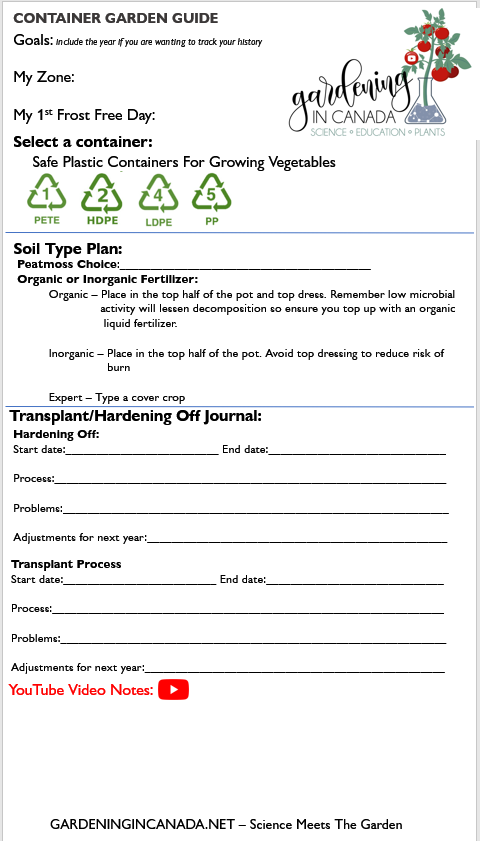
To be safe there are certain numbers of plastic that are safer than others. The ones ideal for container gardens are HDPE (2), LDPE (4), and PP (5). The two that are considered okay are PETE (1), and Other (7). The PETE and others will work if they are new containers and are not showing any signs of decay. Check out the download with a printable guide of what to use and not to use.
The Best Garden Vegetable Container Type?
The best option for someone with limited storage and in need of something a bit lighter is cloth. I will have some links to my favourites below. Cloth pots are the future of container gardening due to the simple fact they do not damage easily and are made without plastic. You can get cloth totes big enough to grow a fruit tree, so the sky is the limit when it comes to options. Keep in mind that because they are cloth daily watering is an absolute must. The cloth allows for ample airflow which means issues such as hot soil and root rot are a thing of the past.
When growing herbs, root vegetables or leafy greens in a container garden it is important to look for something approximately 24 inches deep and narrow. I find rectangles and squares are the best for the utilization of space. Circles tend to be difficult to maintain proper spacing.
The Best Soil For Container Vegetable Gardens
Potting soil is the foundation of your container garden. What you chose for the soil will ultimately decide how often you need water, nutrient needs and how the plant performs. The soil used in container gardens is technically not soil. Container gardens are considered soilless (potting soil) because there is very little sand, silt & clay. The main medium is peat moss and that means certain soil functions perform differently. This means we need to manage and care for the nutrient input differently. But other options like coconut coir also exsists.
Potting Soil Vs. Ground Soil For Container Gardens
Any type of classic potting soil mix will work great. They contain the perfect balance of peat, organic material, and perlite. Some of my favourites are Sunshine Mix 4 and Promix HP, they have the perfect balance of moisture-holding capacity and airflow. Both factors are important when it comes to container gardens. But even more important is the balance between these two characteristics. While it may be tempting to add more perlite do not, to much airflow means higher rates of evapotranspiration and ultimately more watering on your part.
Fertilizers For Container Gardens
One addition you can make to a peat moss mix is a slow-release fertilizer (I will leave a link to some of my personal favourites). Peatmoss-based soils in container gardens tend to have lower rates of microbial activity later in the season. The main reason for this is the heat sink factor as the days get longer and warmer. Soil microbes involved in nutrient cycling do not enjoy high temperatures and tend to die off. What this means for nutrients is less. Without the microbes present to cycle organic material into bioavailable nutrients the plant can suffer. The best way to curb this is with a slow-release fertilizer.
When adding a slow-release fertilizer to the soil it is important to keep it within the immediate root zone. That means keeping it off the bottom of the pot. Placing nutrients that are low in the system is wasteful because most nutrients are water-soluble. That means when you water the nutrients simply end up in the runoff. This is currently a major issue in today’s world because it can result in eutrophication. While your container garden is small it can add up when everyone on the block has one.
Starting Vegetable Seeds In A Container Vegetable Garden
Starting seeds directly in containers is surprisingly the most difficult part of container gardening. This is an issue because the top portion of the soil is exposed to air flow, sunlight & heat. Dried-out soil is the number one killer of young seedlings and seeds. On a plant seed, there is a tiny hole called the micropyle that collects water to signal to the embryo that it is time to grow. If the soil dries out this process is terminated resulting in no plant.
The easiest way to start seeds in a container is by planting the seeds and then covering the top of the pot with either old take-out containers, saran wrap or anything that will help keep up the humidity until the plant has germinated and taken root. Be sure to check the soil moisture daily and top up when needed to keep the humidity high.
The goal is to manage the rate of something called evapotranspiration. This is simply a fancy word to explain how water leaves a soil-plant system via plant respiration and soil evaporation. The top cover is a great way to stop the loss of water because the ambient humidity inside of the container will be too high to allow for any more water loss in the system. If the air is saturated the water everywhere else has nowhere to go. For more on what never to add to a seed starting setup check out.
Transplanting Seedlings Into Outdoor Containers.
Transplanting into outdoor containers is a common occurrence when starting vegetable container gardens. For the most part, these plants will be things like tomatoes, peppers, and brassicas to name a few. The process for this starts about two weeks before you plan to perform a transplant and is called hardening off. If you are unsure when hardening off is be sure to check out my YouTube video going over exactly what needs to be done.
The simplest way to avoid transplant shock is to slowly introduce the plant to the outside elements of wind and high airflows but not the Sun. When we expose the leaves to air movement, we “retrain” the guard cells and stomata to control the rate of water loss. This is going to prevent the limp wilted look you typically get after transplanting. You will want to place your plants in a shaded outdoor every day for approximately a week and cover them at night to cushion from the cold nighttime temps.
Reducing Transplant Shock In Container Vegetable Garden
After the first week, you can slowly start introducing the plants to full sun. For the two days, you will want to one have them out for about an hour. After that, you can increase the length by an hour a day for the next three or so days.
After you have hardened off your plants, you are going to want to reduce transplant shock by watering regularly and providing shelter. If you are looking for ways to reduce transplant shock, I also have a video about that as well.
My favourite way to reduce transplants is through watering daily and sheltering the plant for the first week in the great outdoors. I find this works great with tomatoes and peppers.
Hopefully, this guide was able to help you with your journey in starting a container garden! Be sure to check out the downloadable sheet that will help you ensure success this year in the garden. Here is an interesting read on how container gardening can combat nutrient deficiencies